MSW Logo

Book Two
Rose Bay High School
Revision of Book One
Entering MSW Logo Commands
MSW Logo is an "interpreted" language. This means that commands issued by the user are interpreted by the computer and acted upon immediately, one statement at a time. "Compiled" programs, on the other hand, are first converted into machine language as an entire unit before any part of the program can be 'run'.
Commands are entered in the Input Box in the Commander window at the bottom of the screen.

Commands are executed, after being entered in the Input Box, by either pressing the Return key, or clicking on the Execute button. Each command is recorded in the Output/Command-Recall List Box above the Input Box.
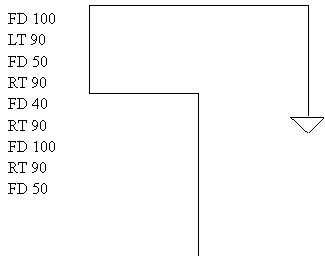
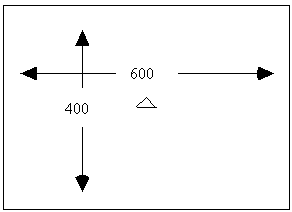
A Typical Logo Program Screen Dimensions
To exit MSW Logo enter BYE in the Input Box, or select Exit from the File menu.
Summary of Selected MSW Logo Commands
|
Command |
Action |
Short Version |
|
FORWARD 100 |
Turtle moves forward the specified number of units. |
FD 100 |
|
BACK 50 |
Turtle moves back the specified number of units. |
BK 50 |
|
RIGHT 90 |
Turtle turns clockwise the number of degrees specified. |
RT 90 |
|
LEFT 45 |
Turtle turns counterclockwise the angle specified. |
LT 45 |
|
PENUP |
Turtle's pen is up. (Doesn't draw as it moves.) |
PU |
|
PENDOWN |
Turtle's pen is in the down position. |
PD |
|
PENERASE |
Turtle erases as it moves. |
PE |
|
HIDETURTLE |
Removes the Turtle 'triangle' from the screen. |
HT |
|
SHOWTURTLE |
Makes the Turtle visible again. |
ST |
|
CLEARSCREEN |
Erases the screen and returns the Turtle to its "home" position in the centre of the drawing screen. |
CS |
|
HOME |
Returns the Turtle to the "home" position without erasing the screen. (Issue a PU command before HOME to prevent it drawing its return path as it goes.) |
HOME |
|
LABEL [HELLO WORLD] |
Displays text at the Turtle location. |
- |
|
SETPENCOLOR 1-15 |
Determines pen
color according to: |
- - |
|
SOUND [1000 200] |
SOUND [<frequency> <duration>] where “frequency” is in cps and “duration” is in 1000ths of a second. |
|
|
SETPENSIZE [10 10] |
Sets width and height of the drawing pen. MSW Logo uses only the second value. Set them both the same. |
- -- |
|
BYE |
Exits MSW Logo |
- |
Writing Procedures in the Editor Window:
|
|
A better approach for editing is to use the built-in Editor window…
1. Go to the File/Edit… menu
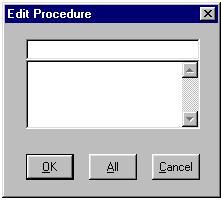
2. Type in a suitable
procedure name and click the OK button. The Editor window appears…
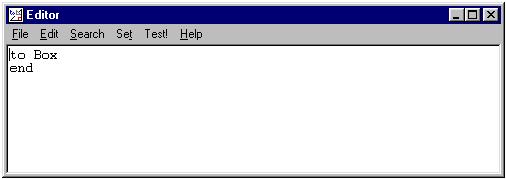
You can type in commands, edit them, cut and paste, just like a conventional word processor. When you have finished defining the procedure go to File/Exit and click the Yes button to save your work..
Remember that nothing has been saved to disk until you do a File/Save.
Saving Your Work in MSW Logo:
The File/Save and File/Save As… menus can be used to save logo files in the usual way, BUT this will only save work that has been defined as procedures. MSW Logo will save ALL of the procedures you defined during the ‘session’ as a file with the extension .LGO. The programme does NOT save individual procedures as separate files. All the procedures you created will be saved. You will lose all of the commands typed directly into the Input Box that were not defined as part of a procedure. (Another great reason for using procedures!)
1. Write the procedure below in MSWlogo’s editor.
To
wow
CS HT
REPEAT 100 [FD 20 RT REPCOUNT REPEAT 3 [FD 60 RT
120]]
END
2. Save your work to your user directory.
· Click on File/Save as
· Find your user directory on U: drive.
Loading Previously Saved Sessions:
The File/Load menu allows you to reload procedures you have previously defined. Only those files with a “.LGO” extension will listed in the dialogue box. If you want to load a file created with a text editor and saved without the .LGO extension select All Files (*.*) from the Files of Type: box.
WARNING: Loading a file will overwrite any procedures from the current session of the same name. ie If you have just defined a procedure called MyPicture and the file you load also has a procedure called MyPicture, the current one will be overwritten by the one contained in the file and you will lose all of the commands defined within the current version.
Activity 2
1. Close MSWlogo
2. Open MSWlogo
3. Load the work you saved in Activity 1.
· Click on File/Load.
· Find your user directory and click on the filed you saved.
· Run the procedure wow
******To Print Your Work Click On BITMAP/PRINT******
Activity 3
1. Make a copy of the table below in Word using copy / paste from the Intranet version of this document. Print out the table.
2. Copy all of the procedures in the table into the MSWlogo editor.
3. Run each in turn.
4. Draw a copy of the shape produced in the right hand column of the table. Put your completed table into your flip file.
|
TO PIC1
|
|
|
TO PIC2
|
|
|
TO PIC3
|
|
|
TO PIC4
|
|
|
TO PIC5
|
|
|
TO PIC6
|
|
|
TO PIC7
|
|
|
TO PIC8
|
|
|
TO PIC9
|
|
|
TO PIC10
|
|
A variable can be thought of as a ‘container’ for different values. You can change the value of a variable at any time.
MSW Logo uses a statement in the form: make “MyVariable 20 to assign a value to a variable.
The value of the variable is accessed in the form: label :MyVariable (NOTE: the colon in front of the variable name.)
Eg
to
multiply
make “Number1 16
make “Number2 3
make “Answer :Number1 * :Number2
label :Answer
end
IMPORTANT – You need to understand the difference between using a variable and ordinary text. When accessing a variable’s value you must put a colon in front of the variable name.
Eg. LABEL hello will produce – hello
Whereas
LABEL :hello will produce – 79
LABEL hello * 2 will produce an error
Whereas
LABEL :hello * 2 will produce 158
Eg
to box :size
Repeat 4 [fd :size rt
90]
end
The size of the box can be determined by the value typed in when running the procedure.
Eg box 20, box 40 , etc.
NOTE: If you type in box, without the value, MSW Logo will report an error.
Activity 4
Fun With Repeat
1. Type the procedure “box” (previous page) into the MSWlogo editor.
Eg. box 50
Box 100
Box 150
Now try these cool programs.
· REPEAT 100 [BOX REPCOUNT RT 10]
· CS REPEAT 20 [FD 100 RT 170]
· CS REPEAT 100 [FD 10 RT REPCOUNT]
What does the command REPCOUNT do?
You can find out by typing : REPEAT 8 [ PRINT REPCOUNT]
For more information look it up in the Help / Index.
User Input
MSW Logo is a Windows programming language. It makes extensive use of the built-in Windows “Graphical Users Interface (“GUI”). If you want to write a programme which accepts user input and then acts on it you must use the standard Windows GUI for user input.
Eg
to multiply
; A sample routine to
demonstrate “readlist”
; and “first” to extract a
number from user input.
make “Number1 first readlist
make “Number2 first readlist
; See the next page for an
explanation of READLIST.
make “Answer :Number1 *
:Number2
home
cs
ht
print :Answer
end
READLIST (RL)
READLIST
The function “readlist” displays the dialogue box (as below) and allows the user to enter text.
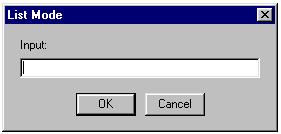
The contents of the input box may be entered as a variable and manipulated by functions such as LABEL.
Eg
to writename
make “TheirName RL
label :TheirName
end
Activity 5
Write a procedure which
will input three numbers and then output their sum.
Use PRINT rather
than LABEL to display the answer in the procedure.
Write a procedure that will input the length of one side of a square. The program will then output both the perimeter and area of the square.
Write a procedure that will input the length of the side of a box. The procedure will then draw the box.
Activity 6
A Game of Chasings for Two
ST Show the Turtle
PU Pen up
PD PenDown
FD Forward eg FD 150 RT Right eg RT 140
Setturtle 1 Sends the next commands to turtle 1
Setturtle 0Sends the next commands to turtle 0
Wrap To keep the turtle visible
RT and LT
Setting up the Game
Player 1 in the Input Box type:
Wrap Setturtle 1 PU ST RT random 360 FD random 200
Player 2 in the Input Box type:
Playing.the Game
Player 1 makes a move with two FD commands and one RT command. eg
Setturtle 1 FD 100 RT 60 FD 100
Player 2 now tries to catch the first player using only one RT command and one FD command. eg
Setturtle 0 RT 30 FD 1 50
Play continues until the chasing turtle catches the first turtle.
Activity 7
The following procedures draw a shell:
to
shells :size
square
:size rt 10
if
:size > 200 [stop]
shells
:size +5
end
to
square :side
repeat
4 [fd :side rt 90]
end
Enter the procedures in the editor and see the result by typing shell 5 in the input box.
Rewrite the procedures so that a triangle is spiraled to produce the pattern.
Make any other changes that you consider improve the pattern.
Print out both the procedures you have written and the pattern produced.